(Almost) silent window fan
Summer is approaching as I write this, and this means the need for a little nighttime ventilation. I personally prefer window fans because you can use them to effectively pull fresh air into a room from the outside when the cool of the night sets in. With a reversible model, you can also use it to eject warm air to the outside with the flick of a switch (if the window happens to be on the leeward side of the building)
However, when sleeping at night its more relaxing to have a soft gentle breeze on you rather than a loud gale. I tried to find a window fan that had a legit *low speed* setting to no avail. This led to a pretty advanced hack which I’m about to share:

So basically, the idea is to take an off the shelf reversible window fan (I spent $50 for the Holmes 1Touch) and replace one of the motors so it runs super quietly. Here’s how you can do that.
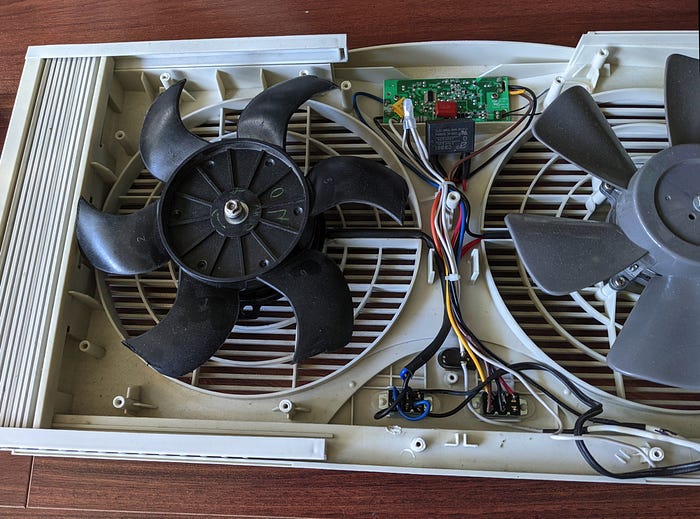
First open up the fan and remove one of the two motors in the 1Touch. (Doesn’t matter which side). 1) remove the stock impeller. 2) unscrew the motor from the frame 3) unsolder the wires that go to the motor where they attach to its direction switch (we’ll re-use the switch, so don’t damage or remove it) 4) unsolder the remaining wires from the direction switch and clip them where they attach to the relay and circuit board. The remaining motor will function fine on its own. Cap any wires that you clipped to make sure they don’t accidentally touch other components
I found a 12volt DC motor online for $30 that’s the perfect size and speed. This one is from a vehicle radiator cooling system and handily comes with a 9"impeller that fits perfectly in the 1Touch! Remove the grill from the new motor since the 1Touch has a grille already. I removed the impeller from the new motor for the gluing process — there’s a single bolt holding it on.

Take the motor and use epoxy to affix it to where the original motor has been removed. Take care to ensure the motor is centered correctly or the blades of the impeller will hit the grille. I suggest you rough up the back of the motor and the white plastic of the frame with some sandpaper before gluing (I suggest JB Weld).

Once the epoxy has dried for 24 hours, solder the motor’s leads to the center pins of the same directional switch. Polarity doesn’t matter since you’ll be reversing it using the switch.
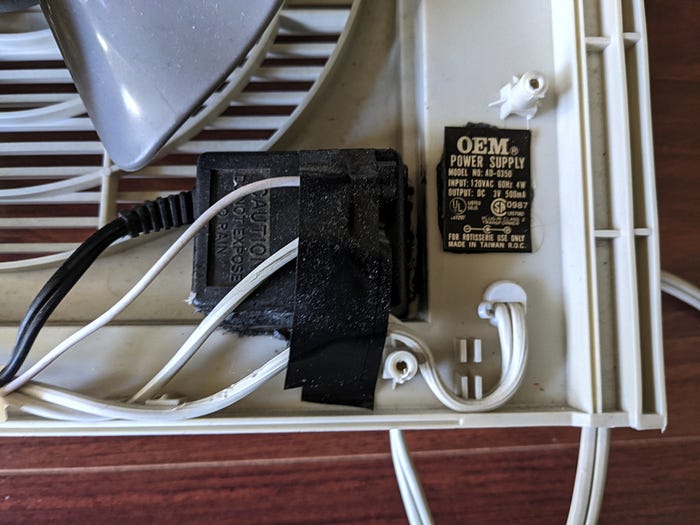
Now here’s the quiet part… Instead of powering the motor with 12v, I power it with just three volts DC. This means it spins nice and slowly — much slower than the motor was designed for, but that’s not our use case. I took a 3V “wall wart” and glued it into one of the corners of the enclosure like this:
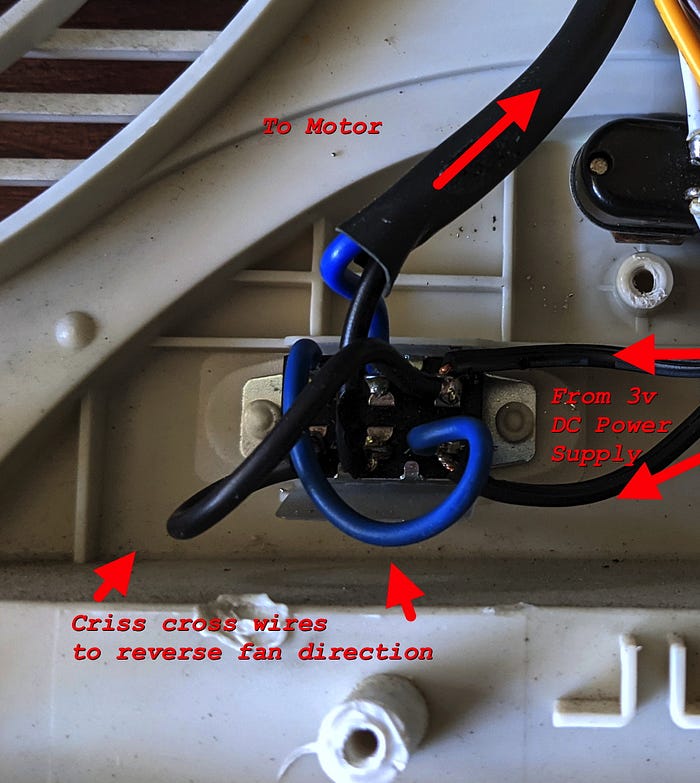
Solder the DC power leads from the 3V power supply to one side of the directional switch for the new motor. Then solder short leads to the other side of the switch, but reversing their position like this:
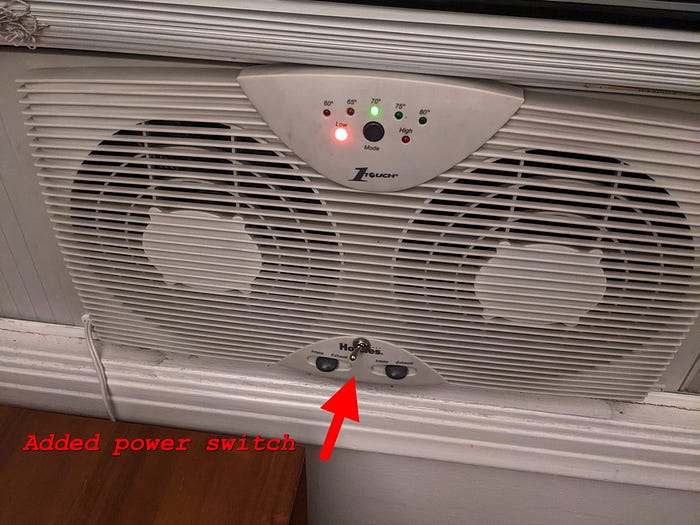
Now we have the DC connections finished, but we have to connect AC to the 3V power supply. Its probably possible to find a switched lead on the circuit board to take power from, but I decided it was easier to just add a DPDT switch where AC comes into the fan.

So moving the power switch to the on position provides power to the new, quiet motor, as well as to the main circuit board.
Now the fan has both its original high speed fan motor, plus the low speed whisper quiet “nighttime” fan which can both be reversed or run separately.